Micrometer:
Micrometer is a measuring instrument which is used for measurement of length, diameter, depth, and thickness, etc.
It is a tool used to measure parameters in engineering colleges, workshops, and manufacturing companies. These are in different ranges to measure different parameters.
For example — 0-25 mm, 25-50 mm, 50-75 mm etc.
It is also known as screw gauge. It's least count is generally 0.01 mm.
For example — 0-25 mm, 25-50 mm, 50-75 mm etc.
It is also known as screw gauge. It's least count is generally 0.01 mm.
It works on the principle of a nut and bolt.
Why did its necessity?
This is a very precise instrument. It can take readings in the order of micrometers. It is also a more precise instrument than Vernier Caliper. With this we can also measure very low values accurately. That's why, micrometer was needed here.It is mainly of two types:
- Manual micrometer
- Digital micrometer
Parts of manual micrometer.
- Anvil
- Spindle
- Lock nut
- Main scale / Sleeve
- Frame
- Circular scale
- Thimble
- Ratche
Constants of Micrometer:
Pitch:
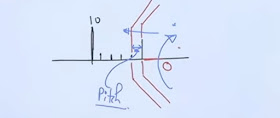
Pitch is the linear distance advances by the head scale over the main scale.
It is the linear distance covered by the circular scale in one rotation.
As shown in picture,
First, our circular scale was at zero. When, we rotated the circular scale in clockwise direction. Then it went ahead by advance, and after that, generally, it reached one division ahead. When the circular scale moves one division, the distance which is shown in picture is called pitch.
If the screw advances by 5 mm for 10 rotations of the cap, then the pitch = 5/10
= 0.05 mm.
= 0.05 mm.
Least count:
The minimum measurement of length is equal to on division on the head scale which is equal to the pitch divided by the total circular scale division. Thus, in the aforesaid illustration, if the total circular scale division is 100,
then, the least count = 0.5 / 100 = 0.005 mm
Formula of Least count = pitch / Number of division of circular scale
then, the least count = 0.5 / 100 = 0.005 mm
Formula of Least count = pitch / Number of division of circular scale
How to take reading?
Total readings = MSR + CSR,
MSR= Main scale readings
CSR = Circular scale readings
Main scale readings (MSR) :
It is the last mark of main scale before cap (head) of circular scale visible to us.
Circular scale readings (CSR) :
It is multiplication of CCSD and least count.CSR = CCSD × Least count,
CCSD :
It is mark of circular scale which is exactly coincide with the reference line of main scale.
For example: 10 rotations of the cap of a screw gauge is equivalent to 5 mm. Find the least count. The cap has 100 divisions. A reading taken for the diameter of a wire with the screw gauge shows four complete rotations and 35 divisions on the circular scale. Find the diameter of the wire.
Here,
10 rotations = 5 mm
1 rotation = 5/10 = 0.5 mm
Pitch = 0.5 mm
Given,
Number of circular scale division= 100
Now,
Least count = Pitch / Number of circular scale division
Least count = 0.5 / 100 = 0.005 mm
We will find out the diameter of the wire.
MSR = 4 rotations × pitch,
MSR (Main Scale Reading) = 4 × 0.5 mm
= 2 mm
CSR = CCSD × Least count,
Here given, CCSD = 35 × 0.005 = 0.175 mm
Now, Diameter = MSR + CSR
Diameter = 2 + 0.175 = 2.175 mm
We hope you will understand this topic.
Thank you.
Some of related questions that help to improve your basic knowledge and you need to know.
Thank you.
Some of related questions that help to improve your basic knowledge and you need to know.
- Meanings of Quality?
- Origin points of quality circle in Japan
- TQM
- what is quality assurance?
- what is quality control?


No comments:
Post a Comment
If you have any doubt, please let me know